Railroad Stoneware

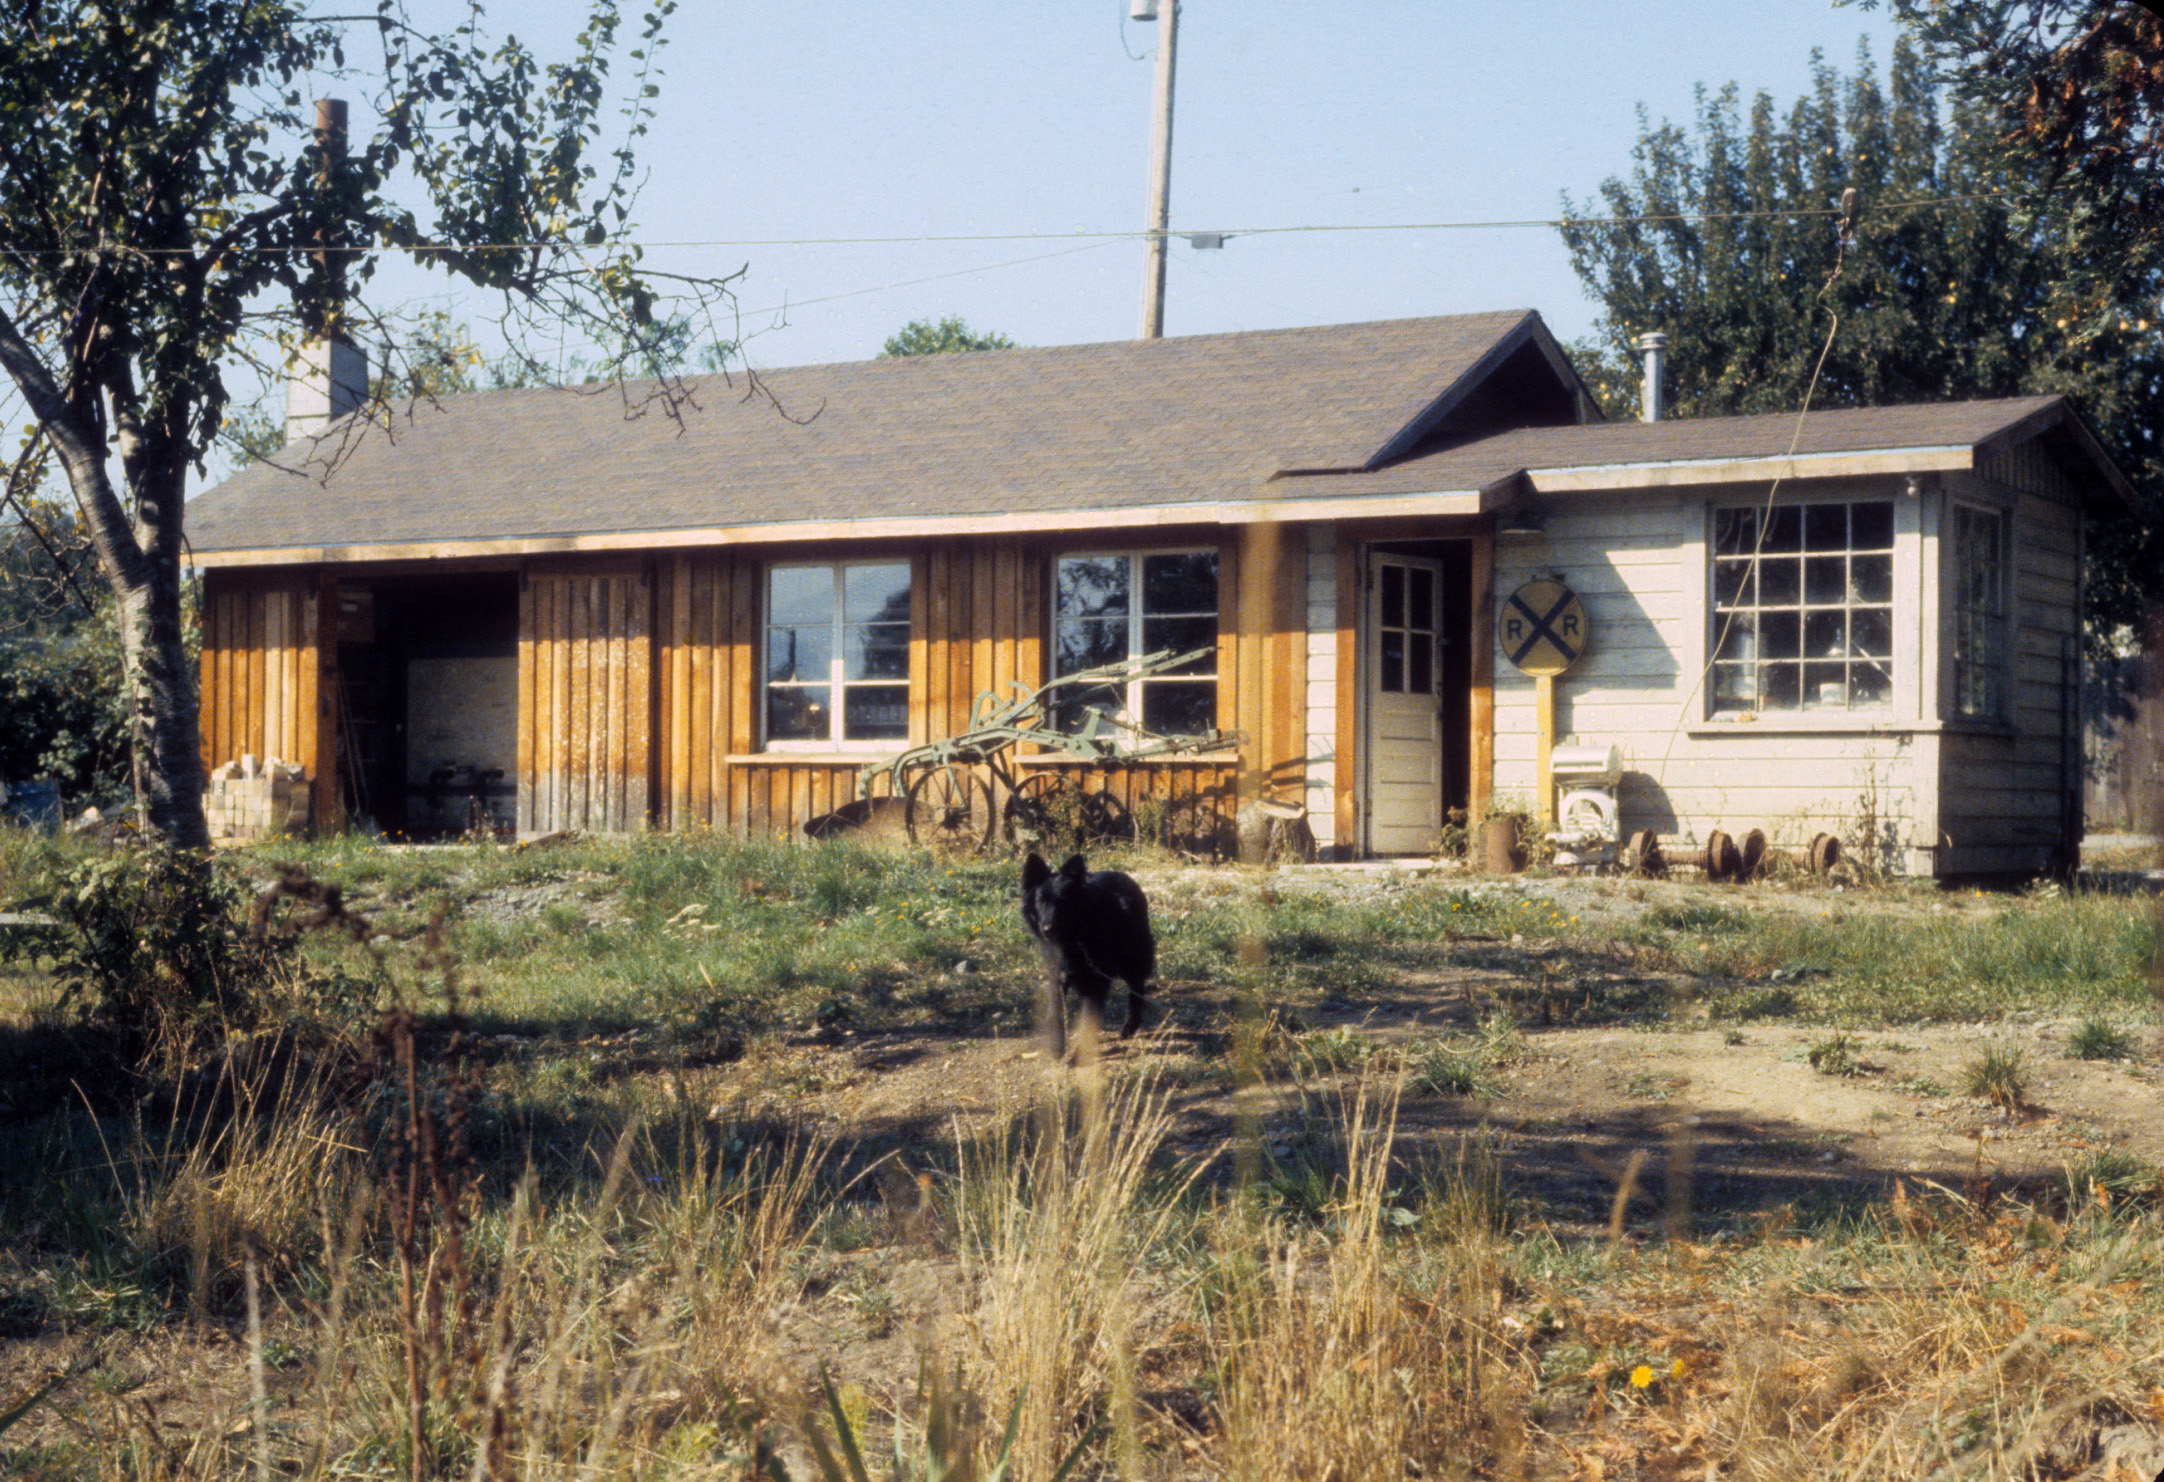
From 1975 to 1985 I operated Railroad Stoneware, a one-person production studio located just off South Railroad Avenue near the tracks of the Arcata and Mad River Railroad in Blue Lake, California, five miles inland from Humboldt Bay. I made wheel-thrown functional stoneware, retailing through biannual studio sales and local craft shows, and wholesaling to galleries, gift shops, and kitchen/gourmet stores in Northern California and Oregon. I discontinued Railroad Stoneware in 1985 when my wife and I moved to Amherst, Massachusetts to attend graduate school.
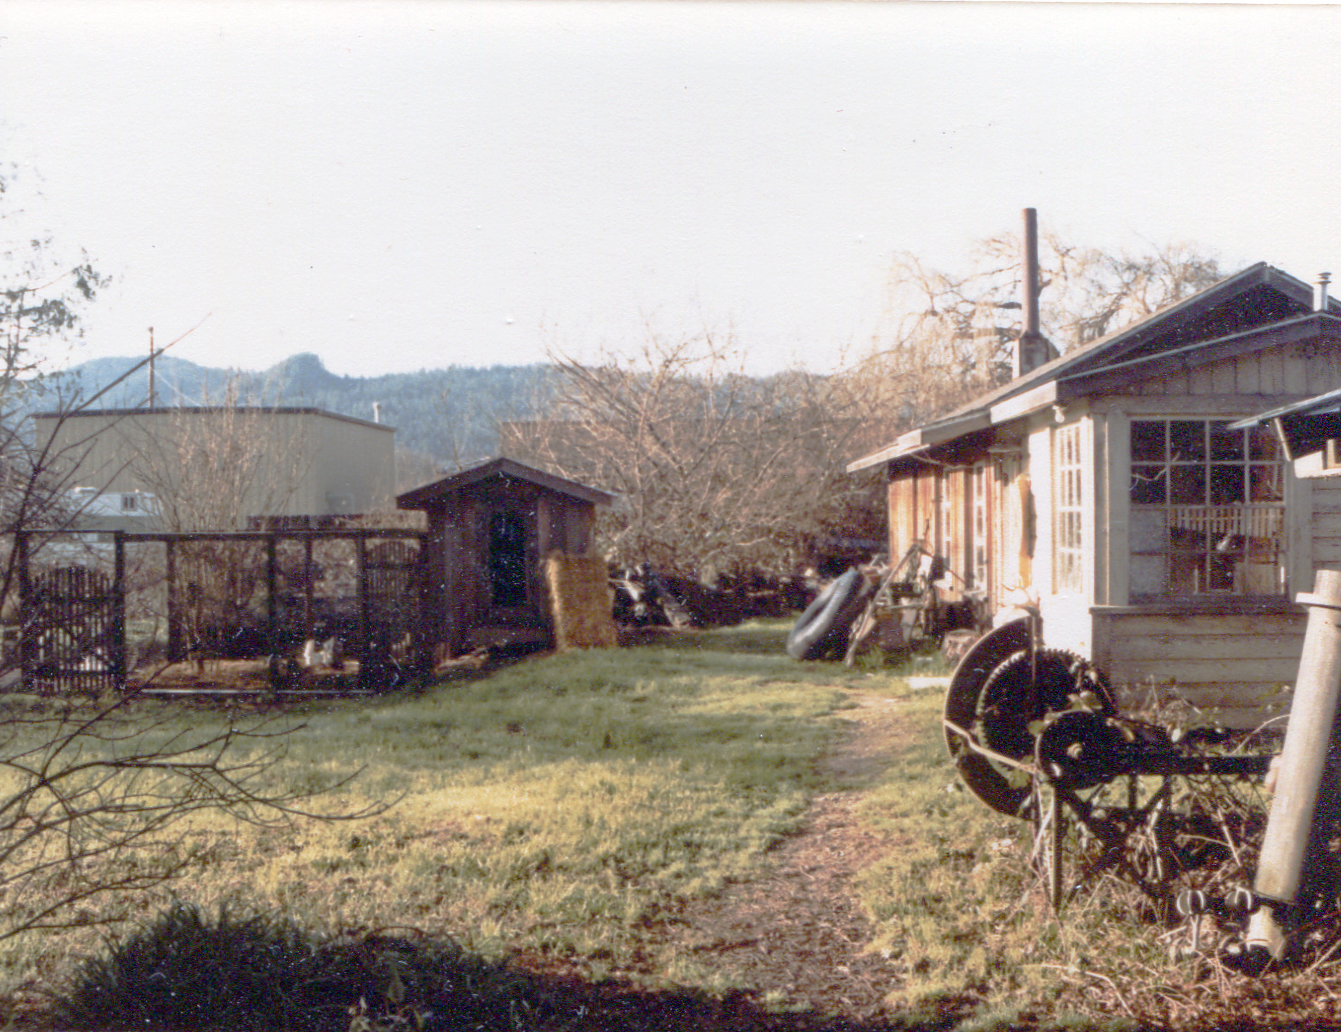
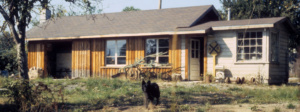
Fresh out of undergraduate school I was hired as a mechanic and welder for the City of Arcata, and it proved to be among the most important training I have received. I built most of my own studio equipment including a Shimpo-style ring-cone pottery wheel, a 100-cubic-foot downdraft gas car-kiln, ware carts, and a large vacuum-deairing pugmill adapted from the Harry Davis plans. I’ve include an image of my workshop in Blue Lake where I worked with machinery and did welding and fabrication. That image will show that this is a very serious part of my life. Below are images of my work from Railroad Stoneware. Scroll down for technical information about the work, plus images of the studio, kiln, pugmill, and wheel. Email me with any questions.
Click on thumbnails to see a larger image. Once you’ve enlarged the image, scrolling works best with the left and right arrow buttons on your keyboard, or on a phone or tablet by tapping the right or left-hand edge of the enlarged image.


Upon setting up my first studio after college, I bought clay from the Robert Brent Company in Healdsburg, California. Brent started out as a full-service ceramic materials supplier before focusing on manufacturing studio equipment. I soon shifted to stoneware claybodies from Westwood Clay Company (now Laguna), primarily Rod’s Bod and Danish White with sand, and sometimes a blend of the two. The production ware was decorated with slip banding and underglaze brushwork in iron slip and cobalt oxide wash, glazed with a clear glaze and a simple palette of colored glazes, and reduction fired to cone-10. Non-production one-of-a-kind pieces were decorated the same way, or with trailed and feather-combed slips and/or with impressed pattern applied with bisque-stamps. The slip-decorated work can be seen on the Slipware page.
All impressed pattern and imagery was created with bisque-stamps that I made. Early on I decided not to use patterns created by someone else, and started carving bisque stamps and rollers. If you like pattern and texture, homemade bisque stamps are one of the best ways to individualize your work as compared to pattern or texture created with commercially-made stamps or pattern/texture mats. If you are interested in bisque stamps, see my handout on Making and Using Bisque Stamps.
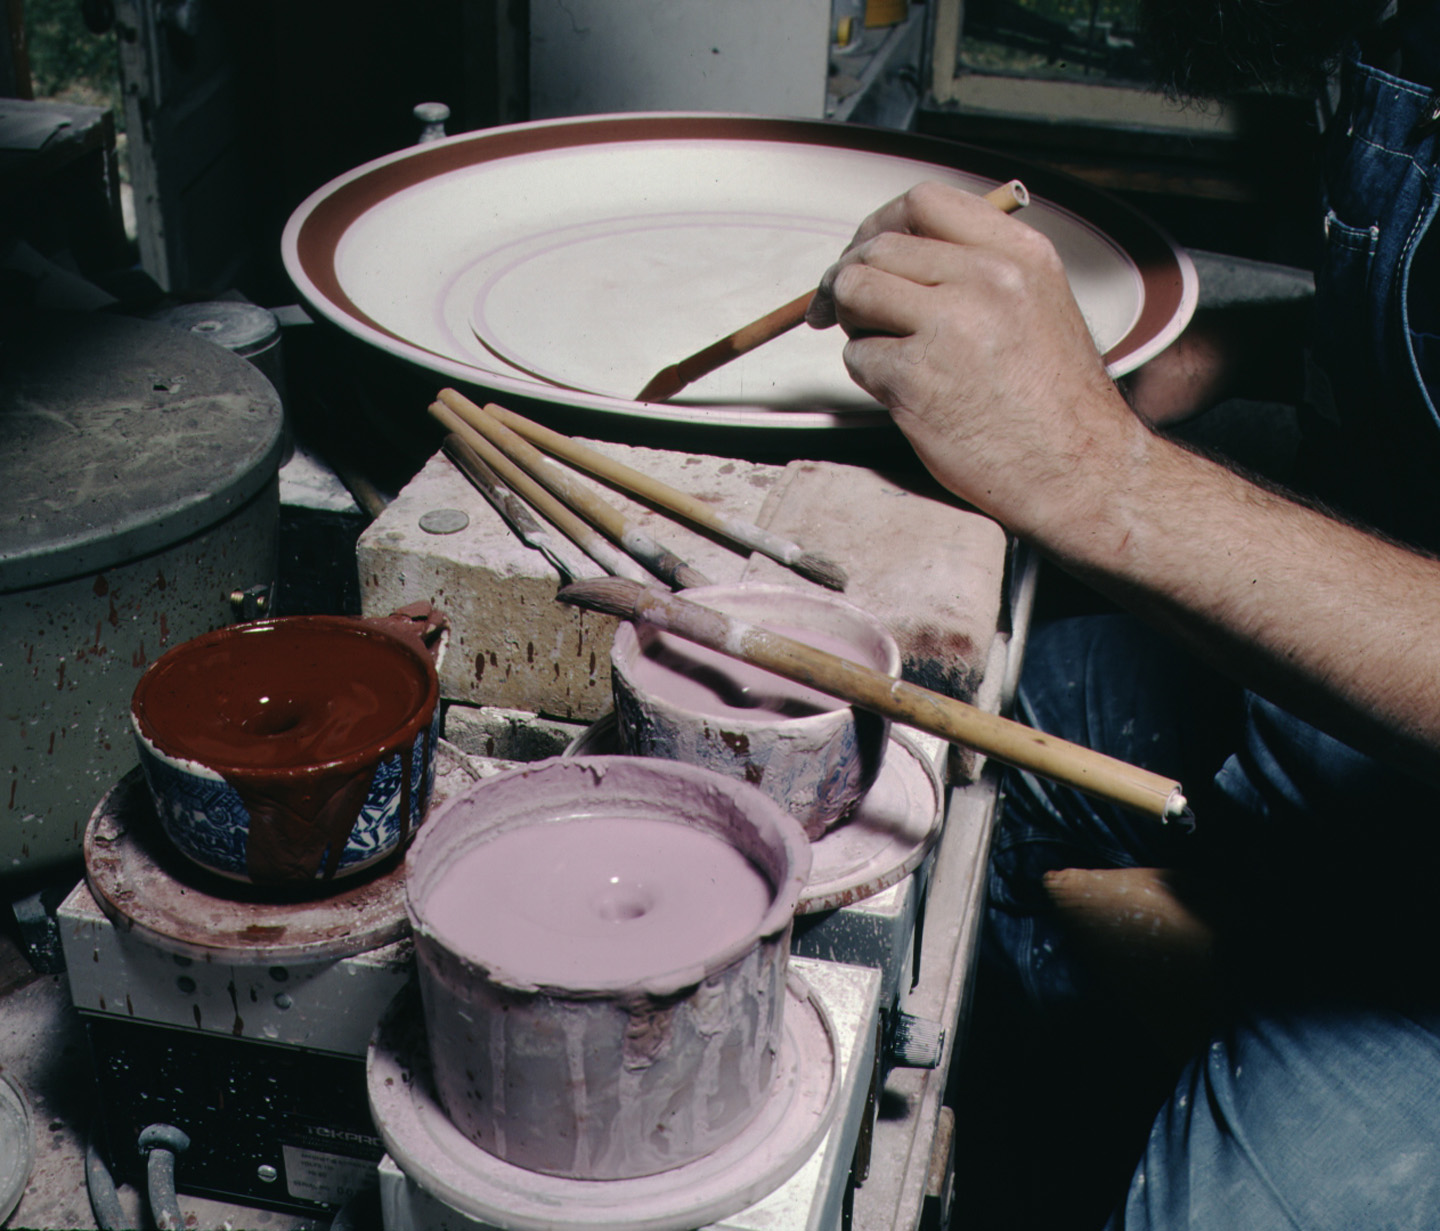
It is worth noting that when I began doing production tableware and kitchenware in the mid-1970s, the brush decoration was done with water suspension patinas of cobalt carbonate and iron oxide, as shown in the fifth and sixth images below. After frequent problems with glazes crawling over both the iron and cobalt, I experimented with other options and settled on applying the iron banding to damp greenware with a saturated iron slip (25% RIO) that shows up through any glaze. For the cobalt brushwork on bisqueware I switched to black cobalt oxide rather than cobalt carbonate, as seen in the seventh image below. Cobalt oxide is less powdery and doesn’t change chemically during the firing, and thus is far less likely to cause crawling when used underglaze.
Many people do oxide brushwork overglaze, but always at the serious risk of smudging or contamination from fingerprints while handling the wares and loading the kiln. That’s especially problematic with cobalt, since it is by far the most powerful colorant. A stray fingerprint will show up bright blue on a white glaze. Applying decoration underglaze with slips, commercial underglazes, or stable oxides eliminates that problem.
When applying brushwork with ceramic oxides in water suspension, the particles settle quickly in the container. In order to achieve the desired concentration of oxides in your brush marks, it is essential to stir the oxides back into suspension every single time you dip the brush. This requires a lot of time and patience, and if you do a lot of oxide brushwork, represents considerable inefficiency. Enlarge image #5 or #6 below and you’ll see the laboratory magnetic stirrers that kept my oxide mixtures in constant suspension while I did brushwork. Considering the high volume of oxide-decorated production work I was doing, it would be impossible to overstate the savings in time and trouble, thanks to these little devices. The stirrers look like small hotplates, and beneath the upper surface, an oblong magnet is driven by a variable speed motor. Inside each cup of oxide is a matching oblong Teflon-coated magnet that looks like a suppository. You can see the little whirlpools caused by the spinning magnets. Low-end stirrers are available from Amazon for less than $40. Buy ones with good customer reviews, and remember to get the Teflon-coated magnets too. Get extra magnets, because they will wear out over time in the abrasive ceramic media. For anyone who does a lot of oxide brushwork, these stirrers pay for themselves almost immediately. The banding wheel in the same image is electric, adapted from an antique Garrard record turntable.
Enlarge image #6 again and you’ll see that several of the oxide containers are “blue willow” coffee cups recycled from a cheap dinnerware set my wife and I obtained with Blue Chip stamps shortly after we were married in 1970. It never occurred to me at the time, but there’s a nice irony in using faux Ming Dynasty blue-and white cups to hold my cobalt mixtures.
Below are images of my studio at Railroad Stoneware, the 100-cubic-foot car kiln, the pugmill, and the Shimpo clone. I designed and built the kiln with Fred Olson’s The Kiln Book as my bible, and used the kiln for cone-08 bisque-firings and cone-10 glaze-firings. After a recommendation by Eugene, Oregon potter and technical guru Hank Murrow, I acquired special stepped silicon-carbide posts made by Ferro Refractories, referred to as kiln posts for floating set. The posts and the bottom, middle, and top shelves stayed in place all the time, while the rest of the shelves could be placed as needed to accommodate different stacking arrangements.
There are a number of details on this kiln that worked out especially well. The eighth image below shows one side of the kiln with the kiln car in the closed position. Click on that image to expand it, and then click the little button in the upper right to further expand it. You’ll see the inserts in the burner ports, reducing the opening to a small round port about an inch larger in diameter than the burner tip. What you can’t see is that this opening flares wider towards the inside of the kiln. This makes the intake of secondary air very precise, which in turn made control of kiln atmosphere easier and more exact than in any other gas kiln I have used through my long career in ceramics. I carved these inserts from high-duty IFB, but they could also be cast with a high-duty refractory like Mizzou castable.
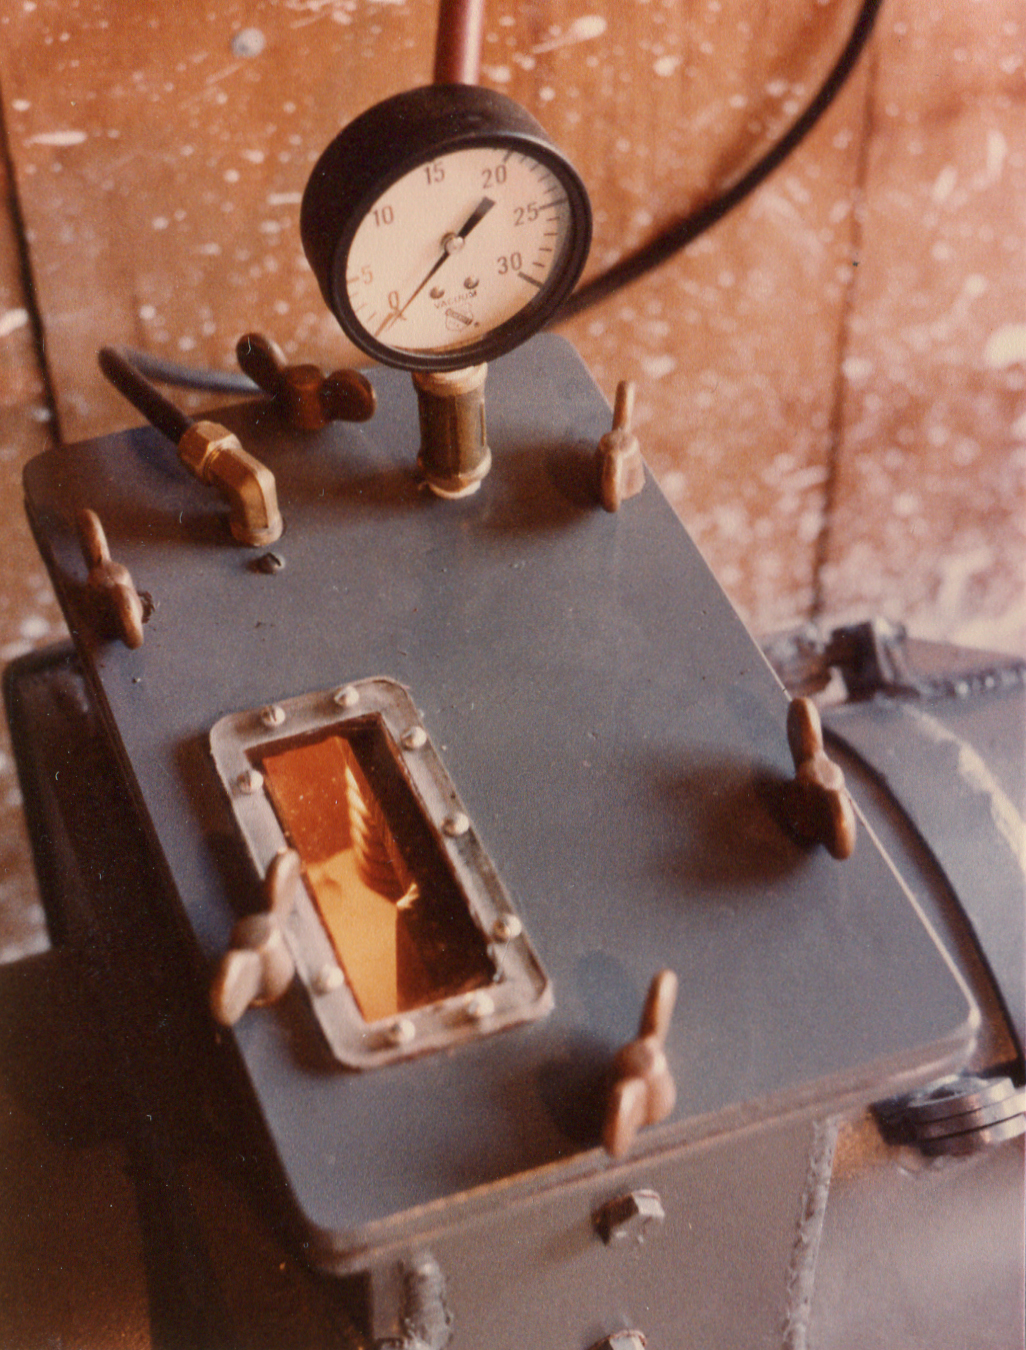
In the same image, you’ll notice a small valve with a white handle located on the burner manifold between each burner valve and the orifice for that burner. That’s the point where you measure WCI (water column inches) pressure at each burner. In many other applications there would be a WCI gauge on each burner at this point, but WCI gauges are very expensive and I was on a tight budget. You can’t see it in the images, but off to the left is a single WCI gauge mounted on the kiln frame. On each side of the kiln, the little valves on each burner are manifolded with copper tubing to a single gauge. When adjusting each burner, I opened the corresponding valve to check the WCI pressure and thus achieve even settings on all the burners.
In the same image you’ll see the homemade pilot burner swung out of the way. The main burners can lift off the orifice spud, and when preheating bisque-firings, I would lift off the center burner on each side of the kiln, loosen a small union below each pilot burner, swing them into place pointing into the orifice, tighten the union, block off the other four burner ports, and light the two pilot burners. They provided plenty of a heat to drive off moisture overnight.
You can see that this kiln is very deep from front to back. In such a design, it could be very difficult to achieve even atmosphere, and I anticipated that. To improve my chances, I incorporated a flue channel. In the images, note that the bottom shelves are raised one brick (4 1/2″) off the car floor. At the back end of the car, the bricks and the rear-most shelf seal tightly against the flue opening in the rear kiln wall (the opening leading to the chimney) when the car is all the way into the kiln. Note that those bricks and the bottom shelves are spaced slightly apart, and the openings increase towards the front of the kiln. The stack is very tall and thus provides plenty of convection vacuum. The pull is greatest at the back of the kiln, thus the narrow openings there and wider towards the front of the kiln. This proved to be a very good design, giving even draw along the flue channel. As a result, it was easy to achieve even atmosphere throughout the kiln.
Another special feature of this kiln was a section of extension track normally stored against the wall in the kiln room. When loading or unloading the kiln, I plugged in the extension track, and the kiln car could be rolled right into the glazing room, as you can see in the images below.
I built the pugmill using plans made available by the late Harry Davis, well-known Australian potter and advocate of studio self-sufficiency. Although rarely credited, he is the inventor of the single-shaft vacuum deairing pugmill. To find out more, check out my article, Building the Harry Davis Pugmill, and go to the Lue Pottery website to download PDFs of Harry’s plans. I mentioned Hank Murrow above. I first met Hank in 1972 during a visit with a friend, and am indebted to Hank for generously providing Harry Davis’s basic plans for the pugmill, plus information about the Ferro kiln posts. Building this pugmill is a huge job requiring advanced welding and fabricating skills, but mine will process a ton of clay per hour and has worked perfectly for over 40 years with only periodic replacement of the shredding screens.
Click on the thumbnails to see a larger image.