Ephemera
This page is for images and other information I’m making available for others to see, including those relating to topics discussed on the Clayart Internet Forum. The most recent are at the top.
Click on thumbnail to see a larger image, and click on the icon in the upper right of the larger image to magnify further. When scrolling through the larger images, it works best to use left or right arrow keys on your computer, or on a phone or tablet tap the right or left edge of the larger image.
Images for Clayart
Since there is no way to post images on Clayart messages, I occasionally put them here so that Clayart members can access them.


Images of East Asian Kilns
These are images I harvested online for use in teaching “Kilns and Firing Theory” in my advanced ceramics classes at Tennessee Tech’s Appalachian Center for Craft. I do not have additional information on any of them, but you are welcome to use the images.


The Best Studio Floor Cleanup System for Handbuilders
We all need to protect ourselves from silica and other dusts, and the most present and common source is dust stirred up from scraps and spillage on the floor. The only way to reduce the risk is to keep your studio floor clean. For those who throw at the wheel and pull handles with a lot of water, the most effective studio cleanup system is probably a good mop bucket and a classic rag mop. That’s what we used at the Appalachian Center for Craft. But if you are a handbuilder, clay debris that ends up on the floor is generally dry. A standard shop-vac is the worst choice, because the finest and most dangerous silica particles pass right through the filter and are forcibly ejected into the room air. Thirty-five years ago while running my studio in Blue Lake, California, I bought a big shop-vac, making sure that the hose could be hooked up on the inlet or the exhaust ports. I bought an extra hose, and when vacuuming the studio I hung the exhaust hose out the window. Depending on wind, some of that dust probably came right back in the window, so it was a half-assed solution at best.
For my studio in North Carolina, I purchased a VacuMaid GV50PRO stationary garage vacuum unit, which allows you to plumb the exhaust port. It’s wall-mounted, and comes with a 50-foot hose and high-quality nozzles. Because it is wall-mounted, I simply mounted it inside one of the outer walls and piped the exhaust outside. I didn’t want critters crawling in the exhaust port, and searched for an appropriate screen. I had a very small glaze strainer with a flange around the rim, so I removed the handle, drilled three holes, and screwed it in place on the outside wall. The vacuum works great.


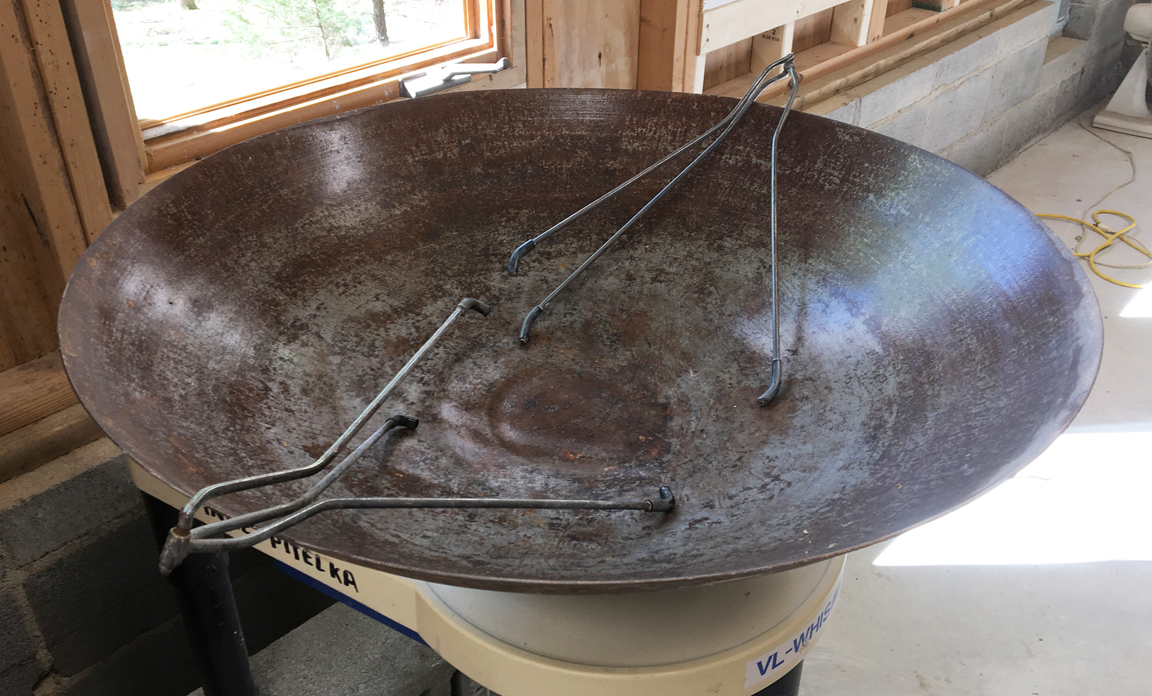
36″ Wok and Custom Tongs for Glazing Large Bowls and Platters
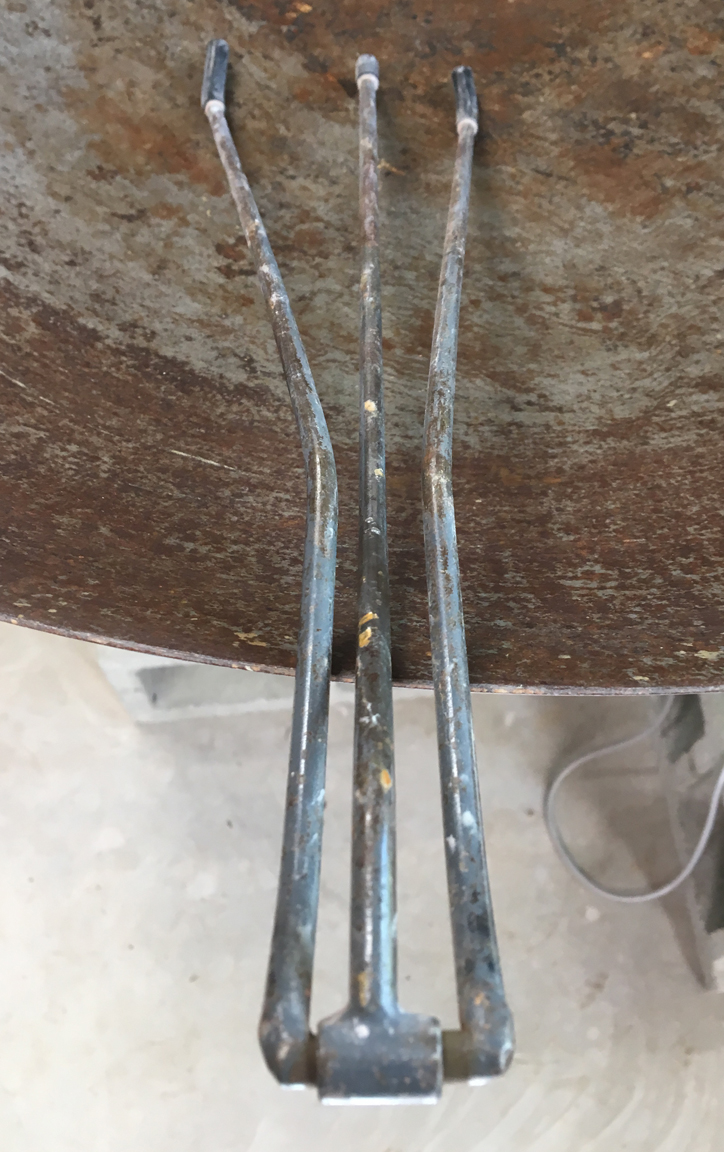
The photos below show the 36″ restaurant wok I use for glazing large bowls and platters, and the tongs I designed and made for holding the bowls or platters while glazing. You can get a 30″ wok online for about $70, and it would work just as well. If you want to dip-glaze large bowls and platters, there is no better vessel, because with only a few gallons of glaze you can glaze any size bowl or platter. The tongs are made from 1/4″ steel rod, and the most readily-available source is probably 1/4″ mild steel gas welding rod from a welding supply store.
The grips on the ends of the tongs are 1/4″ I.D. rubber tubing. For the hinge, I used a piece of 5/16″ I.D. steel tubing over the steel rod, but you could easily use a conventional steel hinge and weld or braze the rod to the hinge. I originally made three sets of tongs, but I let my students use them, and the largest set was lost years ago. With the two sets I still have, I can glaze plates and platters from very small up to about 20″ in diameter.
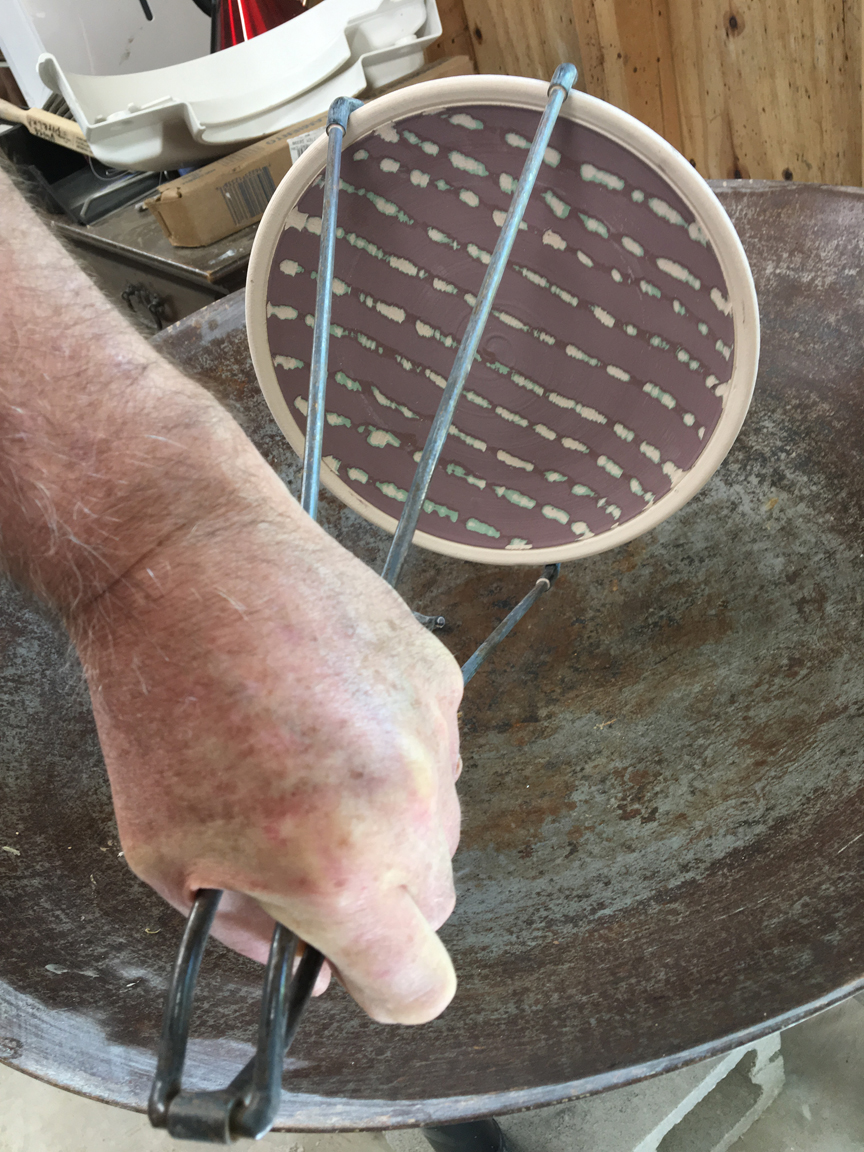
In use, I grasp the platter at opposite edges with the tongs, so my hand holding the tongs is directly above the center of the platter, as one image shows. I dip one edge of the platter in the glaze in the wok, tilt and swirl it around so all surfaces are coated, and remove it from the opposite edge first, so the first edge in is the first out, and the coating is very even overall. When the platter comes out of the glaze, I lift it sideways to shake off excess glaze, as shown in the last image. If it is a heavy platter or bowl, I can support the tong shafts with my other hand while shaking off the excess glaze. The marks left by the tongs are minimal, and easily touched up with a brush.


Salt Kiln Burner System
The photos below show the burner system for a salt kiln my students and I built at the Appalachian Center for Craft in 2011. The main burners are Ransome B-5s, which are overkill for the 30-cubic-foot kiln, but we had them leftover from the previous 60-cubic-foot salt kiln. This kiln runs on high-pressure propane, and the oversized burners mean that we never have to turn them up very high, which means that the kiln runs quiet. When designing and building atmospheric burner systems running on high-pressure propane, people sometimes use a minimum number of burners based on the maximum BTU output of each burner. They end up with an extremely loud kiln. Whether you are on a budget and using GACO MR-100s (which work fine), or are spending the money for Ransomes (which are made of higher-quality cast iron and last much longer in salt/soda use), be generous in the number of burners. At the Craft Center, our 20-cubic-foot soda kiln has three GACO MR-100 venturi burners, a series of previous 60-cubic-foot salt kilns had four Ransome B-5 venturis, and the current 30-cubic-foot salt kiln system pictured above has three Ransome B-5s. The 30-cubic foot soda kiln I am building right now will have three GACO MR-100 venturis.
The pilot burners pictured above are Ransome B-1s, and are plenty powerful to preheat the kiln overnight when single-firing. When firing bisqueware, we general preheated with the center main burner, with pieces of kiln shelf blocking off the other two ports.
All Ransome venturi burners come with the flame-retention tip screwed driectly onto the venturi tube, but it is often advantageous to add a 90-degree bend to get the burner tubes out of the way. That in no way reduces the efficiency of the burners, and can be acomplished with a standard elbow and close-nipple, or with a street-elbow. Notice the clamps holding the burners to the fabricated steel mounts. These make burner-mounting much easier, and are just ordinary, inexpensive U-bolt muffler clamps available from any auto parts store.
There is one slightly funky detail that you cannot see in the pictures. The thermocouples are held in place with pieces of discarded copper thermocouple lead wire, wrapped around the mounting brackets to hold the thermocouple tips in front of the pilot burners. It would not be difficult to design proper brackets fabricated from 1/8″x1″ flat bar or strips of heavy sheet metal. Using wire to fasten the thermocouples in place was initially a temporary measure, but it worked fine, and was enough to keep students from repositioning the thermocouple in front of the main burner, which will burn out the thermocouple very quickly. I had the best intentions of fabricating proper thermocouple mounts, but always had a long list of things needing my attention, and this detail never made it to the top of the list.

